From Web-enhanced face-to-face courses to MOOCs, flipped, blended, and fully online courses, videos are an integral component of today’s educational landscape—from kindergarten all the way through higher education.
CURRENT ARTICLE • May 20
OTHER RECENT ARTICLES
While other forms of visual presentations have cropped up—such as Prezi and Empressr—PowerPoint remains the presentation software of choice. Yet many folks develop PowerPoint presentations without fully understanding all components of the software and/or presenter tricks that could make for much more effective PowerPoint presentations.
Read More ›When I first started teaching online, one of the most frustrating aspects was that I did not have access to an old-fashioned blackboard to give students a visual map of what I was teaching. I felt restricted by the text-based instruction of the discussion board and eventually began creating colorful flowcharts to teach essay structure, for example, or PowerPoint slides to explain the MLA style format.
Read More ›
|
The Doceri interactive whiteboard and screencast recorder app, like the Splashtop app I reviewed earlier, is useful to anyone wishing to remotely control a projected image from a connected computer, make screen annotations on what is displayed (you can make the annotations on a displayed image or a whiteboard), and send your creation for others to see. The thing I liked the most about using Doceri is the ease with which recorded audio and screen annotations can be made and the ability to send/post the finished product to a LMS or similar system for students to access. This app can save you the expense associated with costly classroom whiteboards and the controls in the app are easy to navigate.
Screencasting is gaining popularity among educators and Doceri makes these screen recordings a breeze. Simply tap the record button to begin a recorded session, pause, restart, or stop your recording. The created screencast can be saved as a high-quality video or in low or medium resolution, if desired, and then e-mailed or shared on YouTube, Facebook, or to your Camera Roll. It’s a great way to create tutorials to be used either as prompts for out-of-class discussions or to provide clarifications after class.
The app is robust! Establishing a connection to the desktop or notebook computer is a cinch and the app nicely priced—free! There is, however, one catch: a watermark is present on recordings or projected images. For $4.99 you can get rid of the watermark made on iPad recordings. Images projected from the controlled computer also shows a watermark which can be removed by purchasing a desktop license for your computer. I like free stuff but understand that the app developers need to be compensated for their work. However, what makes paying the $30.00 license fee palatable is the fact that I can transfer the license from computer to computer when I go to different classrooms—something I wish more app developers allowed! I also like the fact that there is no subscription fee for using Doceri, which is a biggie for me! Why would I want to have to pay additional or ongoing fees for a product? Some software titles have made this switch and I really hope that apps do not begin to make this a requirement in order to perform an upgrade.
There are two screens on Doceri which does double duty. In the ‘control mode,’ the bottom screen serves as a place to control a remote computer while the top screen allows for a highlighted pointer to draw attention to a section of the projected content. A nice feature is the ability to change the pointer, its orientation, or the color of the pointer for better visibility. If you press any point on the top screen with one finger, you can use the other finger to change the color of the arrow or change the pointer to a hand. An optional feature of the pointer is that it can be rotated to one of four diagonal positions or quadrants. This is really neat!
Toggling between the drawing and control screens require a tap on the pen tool. Touch the pen at the top left of the bottom screen to make screen annotations—drawing mode. Tap it again and you are back to the control mode. One very noteworthy thing here when working between screens is that Doceri allows you to preserve drawings before going back to remote control of your PC. In fact, you can easily toggle between control and drawing with either: the pen, a resume button, or a miniaturized button of your screen drawings. And, as mentioned earlier, drawings created can be sent to any number of destinations. Oh, before I forget; I like the fact that Doceri supports my selected screen resolution and does not change it to something else. I like having lots of real estate on my screen and resent any app simply making resolution changes when I do not wish it to!
As you work with Doceri, you may want to consider file size—a longer recording will result in a larger file size. This is not a big deal because disk space is cheap, however, from an attention grabbing and e-pedagogical perspective, you may want to keep all screencasts to a reasonable length, say 3-5 minutes. Richard Meyer and John Medina speak to this in their respective texts, Multimedia Learning and Brain Rules. Keep in mind that less is better as you work to strike a good balance of text and images. Too much of one or the other and screencast designers can lose the effectiveness of their created piece, including their audience. This latter is worth considering relative to the amount of textual content I see being used in PowerPoint slides. If all you are going to do with your screencast is provide narration over text—narration of the very text being projected—then what is the value added piece to viewers?
| Doceri pointer options and tool bar |
| Doceri whiteboard feature |
| Doceri settings |
Summary:
There is a lot to like about Doceri: Easy connection; screencasting option; natural flowing ink when making annotations—this is a huge factor when writing on a screen that some apps just do not have. Plus the app features a nice array of tools and has a really good help section. Doceri can easily become your desktop or notebook control/annotation tool of choice! I think you will agree that this app has just about everything you will ever want from creating tutorials to directing attention on a projected image. There are other apps around: Splashtop has separate whiteboard and screen control apps; their Desktop Remote app is $14.99 and their Whiteboard app is $19.99. This same company (Slashtop and Desktop Remote) have different license or subscription options for those interested. Educations, ShowMe, and Screenchomp are other free apps but they do not have a remote or screen control feature. This makes Doceri a much better option as a two-for-one app—something that is very hard to beat!
Dave Yearwood is an associate professor and chair of the technology department at the University of North Dakota.
Read More ›Whether you teach online, face-to-face, or blended/hybrid courses, podcasts can improve student learning, says Charles Morgan, chair of the mathematics department at Lock Haven University. Consider the following benefits:
Read More ›Too often our students consider their work in the classroom as required assignments—not work that has anything to do with what they will be doing in the real world. Oh, maybe they are picking up some skills they might use in their future employment, but that’s about it. As teachers, how do we get students to understand that the work they do in our classes—such as team projects, community service, technical papers, and even research—is relevant to what they will be doing after they graduate? How do we encourage them to keep their materials and use them to validate their work as students? I think I have an answer. Teaching an e-portfolio capstone course for several years has given me a perspective that I believe should be the framework for validating student learning outcomes across all institutions of higher education.
Read More ›February 08
ScreenChomp App Review: Recordable Whiteboard Provides Easy Way to Create, Explain and Share
|
ScreenChomp is a free, yet highly intuitive and powerful app that you and your students can quickly master. To use ScreenChomp you simply touch the record button; draw on the whiteboard using the available pen or markers; and provide a running narrative. ScreenChomp records your voice and drawing and then allows you to upload your creation to ScreenChomp.com. After uploading your project, you will be provided with a link which you can share via e-mail, Twitter, or on the clipboard. Nothing could be easier than that!
Here is a quick recording that I made to describe how ScreenChomp works: http://www.screenchomp.com/t/bogVMQkXmtrN
ScreenChomp also allows you to make annotations on an image or photo in much the same way you will on the whiteboard. The “Erase Ell” feature is a neat option when you need to write new information on the board or want to create a new page. However, there’s also an eraser that allows you to clear just parts of the screen. It would be nice if ScreenChomp had an “Undo” option to make it consistent in appearance to other apps; however, you shouldn’t miss it much if you remember that you can simply use the erase tool to accomplish basically the same thing.
| A quick visual guide to using ScreenChomp |
Summary:
This review was by far one of my shortest I’ve written and it’s because of how easy ScreenChomp is to use! Take a look at the recording I created – it only took a couple minutes to complete -- and I am sure you will agree that mastering ScreenChomp is within the grasp of anyone. So, put your creative mind to work and soon you to will be using ScreenChomp with your students, colleagues, or just about anyone who you wish to show something to while providing voice instructions. Other apps you may wish to look at include: Whiteboard by GreenGar Studios (free), this app also allows for Internet collaboration; ShowMe Interactive Whiteboard by Learnbat, Inc. (free); and Educreation’s Interactive Whiteboard by Educreations, Inc. (free).
Dave Yearwood is an associate professor and chair of the technology department at the University of North Dakota.
Read More ›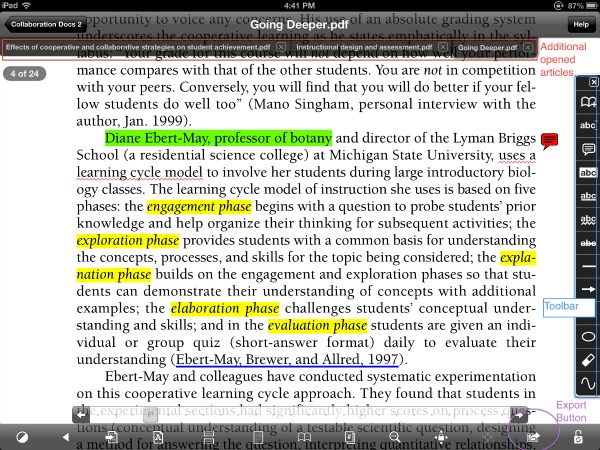
In preparing for my own dissertation research, I began getting electronic copies of journal articles so that I would not be burdened with lots of paper copies and for better file organization. I also did not want to read the copies while sitting at my computer but to use my iPad instead. While reading any journal article there is a need to markup the copy with personal notes, highlights, underlines, and other helpful markings so I needed a program that would allow me to do that on my mobile device.
Read More ›
|
Back in July I reviewed PickMeBuzzer and concluded that, while the app has a lot of potential, it needs some work to make it more intuitive and stable. (See review here)
Well, after working with the PickMeBuzzer app designer, I can tell you that I am now very pleased with the app and have in fact used it a couple times in my class with great success. Here are step-by-step instructions for using it with a Jeopardy-like class activity.
Key to operation is that all devices must be connected to the same wireless system. If you do not have access to a wireless device in your classroom then I have something that will work for you: Apple’s Airport Express (AE). I create a simple password just for this device to allow students to login (you can use it without a password, but this gives some small measure of backdoor privacy within the class).
This ad hoc network works because now everyone is on the same wireless network and it also has the added benefit of preventing student access to the web because the AE is not connected to an Internet jack. Once everyone is on the ad hoc network, you and your students can launch PickMeBuzzer.
Step-by-step instructions
Instructor:
- Select “Create Game” on his/her device.
- Tap, “Start Game.”
Students:
- Select “Enter Game” on their device and select, “??? iPad pickme’s game” as the host (??? is the name of the instructor device. This can be found below the image of the raised hand in the PickMeBuzzer app).
Instructor:
- Tap the red button to reset the system after all students have joined the quiz/Jeopardy session (note: “Buzzer Ready” appears on the screen after each reset).
Notes to Students:
- Students have the option of selecting how they will respond: “Motion Mode” (simply wave your device to register an input); select “Big Red,” a button on your device; or select “Choice” which provides an option for selecting answers to a multiple choice question.
That’s pretty much it for setup. All that is left now is for the instructor to begin asking questions.
Some tips for using the game—more play options:
Instructors have several options on their device:
- Basic Buzzer—a big red button serves as a reset switch and the message, “Buzzer Ready” is displayed when the game is reset (name of the first player who responded is displayed if the system has not been reset).
- Auto Reset—buzzer is automatically reset 2 seconds after someone has buzzed in.
- A Broadcast option, which allows everyone to see who buzzed in. However, if a player selects the “Choice” option, which works well for a multiple choice question with answers A thru E, then the instructor and players who buzzed in will see the selected answer.
- Selecting the “Scoreboard” option allows the instructor to enter scores for up to four teams on the iPad.
- The Game List takes you back to the menu and ends the game.
For iTouch, iPad, or iPhone players: you can verify or change your name by going to “Setting” > “General” > “About” and click on “Name.” What appears in the “Name” area of your device is the name that will be seen by the instructor when students buzz in.
Special note: Your iOS display will remain on as long as the PickMeBuzzer app is running (it will not go into sleep mode), so you may wish to monitor battery power accordingly.
If you would like to receive a copy of the Reverse Jeopardy game I used in two of my classes, please send me an email at yearwood@und.edu. I am happy to share it.
Dave Yearwood is an associate professor and chair of the technology department at the University of North Dakota.
Read More ›November 16
App Review: CloudOn
|
Cloud users have a variety of options for accessing content as well as the option of using any number of apps to create content, e.g. documents, spreadsheets, and presentations just to name a few. Many of the available apps in the iTunes store and Google Play even mimic computer application programs that most of us use on a daily basis and CloudOn is one such app.
Many individuals use Microsoft Office as a one-stop application program for any number of every day tasks, so it is not surprising that someone figured out a way to provide iPad and Android users with the ability to read and edit Word, Excel, and PowerPoint files.
CloudOn is attractive for precisely this reason and the app makes it possible for uses to do the same kinds of things that are possible in some of MS Office’s applications programs. Launch CloudOn and you can use Dropbox, Box, or Google drive to access files and to save your creation. CloudOn has a banner similar to what you would find in Word, Excel, and PowerPoint and this familiar interface makes it a natural selection for creating your documents, spreadsheet, or presentation on the iPad.
Here is an example of that banner:
| The user interface in CloudOn is fairly simple and straightforward. Here is an example of what I mean. |
| |
With CloudOn you can access and save documents to one of these three storage areas: Dropbox, Box, and Google Drive. Best of all, the cost of using CloudOn is free, assuming you stay within the allotted space or storage limitations of your cloud storage provider!
Summary:
There are many ways to work in the cloud and it is really a matter of choice, not to mention storage options, rather than anything else. DropBox provides 2G of storage space; iCloud, Box, and iDrive Sync gives you 5G; and Microsoft’s SkyDrive provides a whopping 7G of storage. Free is good, so have fun using CloudOn and any free cloud storage provider. One thing to keep in mind, at the time of this review CloudOn only appears to provide access to Dropbox, Box, and Google Drive. Do you have a favorite cloud provider? Please share in the comment box.
Dave Yearwood is an associate professor and chair of the technology department at the University of North Dakota.
Read More ›